在OSEP中使用NodeMCU ESP8266
0.認識NodeMCU
D0==>16
D1==>05
D2==>04
D3==>00
D4==>02
D5==>14
D6==>12
D7==>13
D8==>15
D9==>03
D10==>01
GPIO是什麼:https://zh.wikipedia.org/wiki/GPIO
類比腳位是A0
1.安裝osep
inet 192.168.50.71/2/sites.google.com/view/osep-scratch3/%E4%B8%8B%E8%BC%89?authuser=0
bdesigner下載
https://bdesigner1.webnode.tw/%E6%AA%94%E6%A1%88%E4%B8%8B%E8%BC%89/
fritzing下載:https://drive.google.com/file/d/1tymfsEWrtGUNtdUsD3qv9k8lTA7nsWsV/view?usp=sharing
2.arduino ide燒錄韌體(含wifi ssid和密碼)
arduino ide燒錄設定:https://wdpsestea.blogspot.com/2021/06/arduino-ide-nodemcu.html
注意:NodeMCU ESP8266只支援wifi 2.4G無線連接,請不要設定5G AP的連線
3.執行osep s3-extend-tool連上s3e
4.執行線上或是離線版的osep_scrathc3,開啟擴充套件esp8266
osep線上版:https://ys-fang.github.io/OSEP/app/
5.數位角位輸出亮led燈
使用D2(GPIO12)來亮啟LED燈。
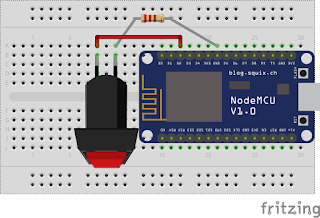
6.讀取數位角位信號
7.做類比數位輸出pwm-呼吸燈
8.讀取類比腳位信號
NodeMCU只有一個類比腳位A0
9.接伺服馬達
伺服馬達是高用電的設備,現在常見的伺服馬達,建議要接5V的外接電源,電流量要300MA,單一NodeMCU的電量不足以支持伺服馬達。圖使用腳位為D2(GPIO4)
10.超音波測距HC-SR04
其他:
fritzing:
https://fritzing.org/download/
https://www.npackd.org/p/fritzing/0.9.6
教學播放清單:
https://youtube.com/playlist?list=PL52qbzg6rwU65672-2hjKSuNagPTB_0cX
osep_scratch3線上版:https://sites.google.com/view/osep-scratch3/%E7%B7%9A%E4%B8%8A%E8%B3%87%E6%BA%90


沒有留言:
張貼留言